So, when I was in Japan, I had the feeling that this is what heaven must feel like. You have all the fun craft and toys at your disposal, if only life is just like that. Oh yeah, it can be, if I win the lottery or something... sigh.
 Anyway, one of the kits I picked up, and snuck by my mom (who wasn't allowing me to buy stuff) was the Original Keshigomu kit, gesundheit... haha, I know. Mind you, I'm a grown woman, and my mom still has that hold on me... go figure.
I highly recommend any beginner to get the starter kit. Not only it's a good value, it is also has all the basic stuff to get you started and not have to fuss with all the little parts and buy them individually.

I decided to do a tutorial because first of all, I don't read a lick of Japanese. Second, there's no clear instructions anywhere on the Interweb to show me how to do this. And while there are videos (more like commericals) for the product, and the kit does come with instructions, it doesn't help me when I try to decode Greek without knowing what I'm doing.
That said, first off, where to get this kit? I got mine at Laox store in Akihabara, which is right outside of the station. The area is known for Anime, Video Games, and Electronic mecca. The Laox store is a giant department/electronic store. Think of Best Buy but 7 stories high and packed full of stuff from movies to TVs to office supplies.
 If you're in Japan, I'm sure the easiest ways to get the kit is to go to any toy stores. If you're a US user like I am, I did fine them on eBay. Another online vendor is Hobby Link Japan (http://www.hlj.com/). I have not tried either one of them, so can't tell you how they ship, but merely they are available out there.
I also thought that there's a limited release of this type of kit by FAO Schwarz, distribute throught Toys R' Us, don't mark me on that, I just saw it in passing and not sure if that's still available.
Ok, on to the tutorial!
 As the first photo showed you what the kit looks like. Obviously, I would pick something Hello Kitty related. Duh!
The 2nd photo shows you what's included in the kit. It has the setting piece, a teezer looking piece to help steady your hand while placing the pieces. Cards, more like templates, and the gum pieces themselves.
If you remember way back when, rubber erasers are really made out of rubber gum. So, in Japanese, they call these pieces gum. You can use them to erase things or make something like these cool erasers.
The 3rd photo shows you the type of templates they have included in the kit. Since this is Hello Kitty based, obviously they have HK. But there are kits based on other cartoon characters. I also bought a glow-in-the-dark kit as well. Each supplement kit comes with additional gum sticks and templates, assuming that you have the holder (the pink thing).

The templates, as you can see, comes in 2 sizes. Large and small. If you're creative enough, you can make it bigger and combine pieces. You can try to make it smaller, but the difficulty lies in the fact that the little pieces will tumble over and not stand still together. I know, cuz I've tried. I do know that they have a newer kit that has spacers, so you can make a true heart shape or something else.
What you need to note is that for the smaller size it's a 10X10, which means 10 rows down and 10 columns across, that's 100 little pieces of gum for you to piece together. The larger size is 13X13. There are template on in the kit so you can draw your own, and you can get it here. That way you can design your own eraser.
On the upper left hand corner, look at the 4th photo, you see different color w/ a number next to it. That is a guide to tell you that you need that many pieces for that color. So you can peel them apart ahead of time and go w/ that guide (see 5th photo).
 Once you had the pieces together like the template (see 6th photo). You are ready to pack it in. Make sure you remove the template. Since it's a cardboard, pretty sure it's not a big deal if it went thru the microwave, but if you have the eraser piece in w/ the template, it will stick. Use the 90 degree L piece to squeeze in the pieces. That way it will not move during transport. Where are you transporting it to, you ask? We're moving it to the microwave. Yes, how else did you think they would seal together?
Before you put it in the microwave, put a tablespoon of water over the pieces. (see 7th photo)The water is going to help bind the little pieces together. Do make sure that the entire piece has some moisure. No need to dump a cup of water over it, just make sure the water is spread out evenly. Once that's done, you're ready to close the holder and pop it into the microwave.
Since the instructions are written in Japanese with the assumption that the user will be using a Japanese microwave, which is between 500 - 600 watts. In US, most average is 700 watts. So, instead of melting your piece unnecessarily, you can use this guide I found on the internet. Basically, if you were to use the 500 watt microwave, you put it in for 1 minute. So, if you adjust it to 700 watts, it'll be about 45 seconds. Check your microwave on the wattage before putting this in there and melt the whole thing off...

If the eraser came out too loose or easily peel apart, then you need to pop it back in for 10 more seconds, if it's melted like wax, then you should've subtract 10 seconds. Play around w/ it, until you like what you got.
 After you take it out of the microwave, put the holder in a bowl of cold water for 10 mins. As you can see, I put a towel down just in case I make a mess.
Once you open the holder, there will be some moisture that didn't get heated up and evaoprate into the rubber eraser. So it will be slightly damp, just dry off w/ the towel.
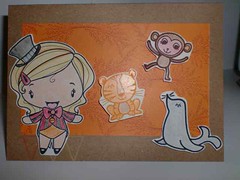
 Then, ta da! Here's your final product.
As I said before, there are different kits available out there. You can drool about them here. They have glow-in-the-dark kit, Deluxe kit, sweets, tamagotchi, beans... and so on.
Hope you enjoyed it. I enjoyed playing w/ it and making these cool little erasers.