Thank you everyone for pitching in on the window card. There was a question about what type of ink to use best with the plastic. The answer is StazOn. I had used craft ink and didn't work too well. Frankly, I'm still afraid to touch it, little to say send it to someone. So, that'll be a re-do. Anyway.... on to the card!
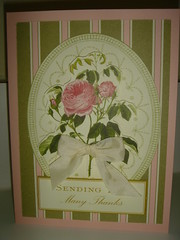
Every so often I will scower Hobby Lobby, Michael's and JoAnn's clearence bin and see what I can find. Some days I have better luck than others. I usually have better luck right after they have a new shipment of new stuff. Sometimes being inside the city doesn't serve that purpose either... I tend to find better deals outside of the Loop in the suburbs areas.
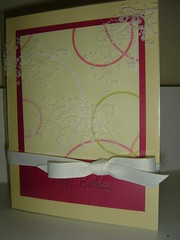
So, I had picked up a bunch of Anna Griffin's card packs. I don't think they make those anymore. But I picked them up for $2 and it's just fun and I love them. The main reason is that sometimes when I'm in a rut, I can just play around with what is given and hopefully jump start from there.
I had fun playing w/ this set, and I did deviate from their suggestions. It's kinda neat to just not think and follow instructions once in a while. Can I tell you that this project had me revive my Bow Easy? If you don't know what a Bow Easy is, it's the best $5 I've ever spent on a whim. You can see a tutorial here. And I know you can type Bow Easy in YouTube for instructions.
Basically, it guarantees to have perfect bow every time. The little card is small but you can make 7 different sizes bow. The trick, however, is to remember to go over and under the little thingamajig. If you watch the video, you'd understand. Like I said, best $5 I've ever spent.
Anyway, gotta go back to my audit. Have a great day!
Supplies:
All supplies by Anna Griffin
Wednesday, July 22, 2009

Monday, July 20, 2009
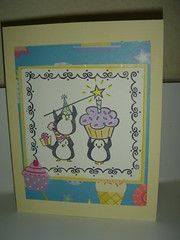
Bday penguins
Well, my mom requested a bday card for one of the students that she's working with from University of Tokyo. It's kinda neat because naturally you think, the students must be from Japan or definitely Japanese native. Turns out, they accepts students from all over the world. I know it's not something so astounding considering we do too here in the States. But for a country that's not a melting pot like us, to accept students from Indonesia, India is kinda a stretch to me. Not only do you have the language barrier, you can only attend classes in English. Of course, unless they already fluent in Japanese. But I just find that very interesting.
Anyway, the card is for one of the students that's here for the summer that's participating in a research program. My mom, being a giver that she is, is going to host a BBQ on top of doing the gift thing. I'm thinking she's being reimbursed for it, but no... she's doing it out on her own. Urm... ok... no one can stop her, I guess. Just hope everyone appreciates it.
Supplies:
Card by DCWV
Patterned Paper by American Crafts
Stamps by TCP
3D embellishment by Paper Studio
Anyway, the card is for one of the students that's here for the summer that's participating in a research program. My mom, being a giver that she is, is going to host a BBQ on top of doing the gift thing. I'm thinking she's being reimbursed for it, but no... she's doing it out on her own. Urm... ok... no one can stop her, I guess. Just hope everyone appreciates it.
Supplies:
Card by DCWV
Patterned Paper by American Crafts
Stamps by TCP
3D embellishment by Paper Studio
Friday, July 17, 2009
pretty ladies
I'm so tired of not creating... is that backwards or what? I want to create, I do, but when I do get a chance to sit down, my muse decide to go on vacation... I know, I know, lame excuse, but it's true.
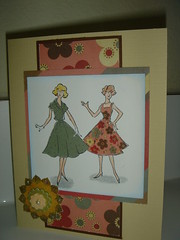
So I finally force myself to sit down and work. I pulled out my favorite color palette and nada. I tried to surround myself with pretty pretty paper, and nothing. I made myself to go back to the stamps I have and see what I have to play with, zilch. So, I went to my favorite stamps and see what I can do, and this is what I made.
I've always like the 40s-ness of it. I wish I have more stamps that are like that. I've checked out Bombshell Stamps, but they are a tad edgier than my 40s primp and proper type feel. Don't get me wrong, I love their stamps, but I prefer these type. (Yes, I do watch the Donna Reed show, and I do think the puffy dress and wit is great). I guess alot of the stamp companies who dare to go retro, either thinks it has to be tattoo feel, or groovy feel. They did have some fabulous clothes, ya know. I digress.
So, anyway, I went for the easiest route for layout and got something going. Hope that is simple yet, 40s-ness.
Supplies:
Card by DCWV
Papers by Cosmo Comic Jitterbug
Stamps by SU
3D embellishment by K&Co.
So I finally force myself to sit down and work. I pulled out my favorite color palette and nada. I tried to surround myself with pretty pretty paper, and nothing. I made myself to go back to the stamps I have and see what I have to play with, zilch. So, I went to my favorite stamps and see what I can do, and this is what I made.
I've always like the 40s-ness of it. I wish I have more stamps that are like that. I've checked out Bombshell Stamps, but they are a tad edgier than my 40s primp and proper type feel. Don't get me wrong, I love their stamps, but I prefer these type. (Yes, I do watch the Donna Reed show, and I do think the puffy dress and wit is great). I guess alot of the stamp companies who dare to go retro, either thinks it has to be tattoo feel, or groovy feel. They did have some fabulous clothes, ya know. I digress.
So, anyway, I went for the easiest route for layout and got something going. Hope that is simple yet, 40s-ness.
Supplies:
Card by DCWV
Papers by Cosmo Comic Jitterbug
Stamps by SU
3D embellishment by K&Co.
Monday, July 13, 2009
Muse out on vacation
I feel so sad, I've tried to sit down and make cards, and nothing is coming. Nilch, nada. I think my muse went on vacation. :(
That said, I've been browsing other blogs. Here's one that I stumble upon and just love. It's called One Pretty Thing , and they are awesome. Every week they have different types of round up of links on the internet and they pull it to one place. Some times the links I've seen from various blogs, but some that I may have skipped over and they show it to me, like it's new again. So, it's very neat. Go take a look!
Monday, July 6, 2009
Flower birthday
I saw the Craft Plastic at the store and I had a $25 gift card burning a hole in my pocket. I'd figured what the heck.
So, here's my thing about craft plastic. Either I don't know what the hell I was doing, or I'm not using the right ink, or just a user defect. Here's why:
I got the plastic, and I cut just enough for the card front and a tad to overlap to the back, because I'm a cheapskate. I didn't want to kill the entire piece of plastic, which that's what I do w/ paper too. That's probably why I have so many little bits and pieces of scrap papers.
ANYWAY! So, I stamped it w/ white ink and thought, ok... that'll work. It looks pretty, it looks good. Except, I smeared the image. You can't tell, it was quite strategic... NOT! But, you can't see it. I tried to take a picture of it, and some of the ink is on my thumb. Hmm... :-/
Well, I don't think I'm brave enough to emboss or attempt to dry it off... so I'm going to try again with another type of ink. So, wish me luck.
Supplies:
Card by DCWV
Patterned Paper by Memory Box
Craft Plastic by Grafixarts
Word stamp by Stampendous
Flower stamp by Inkadinkado
So, here's my thing about craft plastic. Either I don't know what the hell I was doing, or I'm not using the right ink, or just a user defect. Here's why:
I got the plastic, and I cut just enough for the card front and a tad to overlap to the back, because I'm a cheapskate. I didn't want to kill the entire piece of plastic, which that's what I do w/ paper too. That's probably why I have so many little bits and pieces of scrap papers.
ANYWAY! So, I stamped it w/ white ink and thought, ok... that'll work. It looks pretty, it looks good. Except, I smeared the image. You can't tell, it was quite strategic... NOT! But, you can't see it. I tried to take a picture of it, and some of the ink is on my thumb. Hmm... :-/
Well, I don't think I'm brave enough to emboss or attempt to dry it off... so I'm going to try again with another type of ink. So, wish me luck.
Supplies:
Card by DCWV
Patterned Paper by Memory Box
Craft Plastic by Grafixarts
Word stamp by Stampendous
Flower stamp by Inkadinkado
Sunday, July 5, 2009
purse box tutorial
So, I've been meaning to do a tutorial for a while, just didn't have the time, and blah blah blah excuse. Finally, I got the pictures, the measurements and all that jazz. If you want to know what it looks like first, then scroll to the bottom, otherwise enjoy the tutorial. :)
1, Ok... start w/ a piece of 12X12. Cut it to 11 3/4X 11 7/8. The length is the 11 3/4 side.
 2, Score the top and bottom side 3 5/8. The middle should be 4 5/8. The middle will be your 'bottom' of your box.
 3, On the 2 side flaps, cut off 1 inch both on top and bottom, leave the middle part in tact. It should look like this:
 4, on the side flaps, this is where it gets tricky. Make sure whatever you do on one flap it's done equally on the other. Otherwise it will not close properly. (pardon the yellow paper w/ the notes, hee hee)
On one of the flaps: make sure to leave the middle of the flap 2 inches, which means left and right both should be 3 7/8 from the edge.
This is where it gets tricky: you're going to score in the a shape of a fat W, except the middle point will be way higher than the 2 outer prongs. On the outer 2 prongs of the letter (like a V), you go from the 3 7/8 from the base of the flap outwards 2 7/8 on both sides.
In the middle 2 prongs (the upside down V part), again from the 3 7/8 outward 3 3/4. The 2 sides essentially met at the middle. The middle point should be 3 inches from the outer 2 prongs.
When you cut the part from the apex of the point to the top of the outer prongs, to the edge, it should look like this:

Make sure you do it on both sides. Which will look like this: (go ahead and fold the W). This is also tricky, the outer 2 prongs of the Ws is a valley fold, the inner 2 prongs are mountain fold. So, it should prop up like this:

When you do it on both sides, it should look like below. What you should do is for the middle panel, match the 2 sides and score the base of the purse. It should come out to be 2 inches wide. The beginning point would be the bottom 2 points of the W fold, and both sides should match up.
On the longer middle panel, go ahead and fold the 2 flaps and make sure the short part of the flap (the non pointy parts) meets in the middle. Then fold in about an inch on both ends to secure the flaps.

When everything is scored and folded, you now can prop and fold them up. The 2 pointy part of the W fold is the side of the purse box. So, you need to make sure that the tip of the fold and the 2 sides, matches with the 2 sides nicely. So, go ahead and fold everything and make sure they all line up nicely too.

When the box is pull flat, one pointy flap will overlap each other. But when you are ready to put it in box form, they should pull up nicely.
 Now, you should punch 2 holes on the middle panel on the 2 ends. One punch per end. Then insert ribbon thru the middle lengthwise. The length of the ribbon is really up to you. I did 1.5Xs the length of the box flattened that way once it pulls up, there's enough room to tie a pretty bow.
 So, after all that - Voila! A purse box!
So, give that a try, and let me know if the pattern doesn't work or if you have any questions. Hope you enjoy it.
Wednesday, July 1, 2009
Doe, a deer
Here's my attempt at making a scene... no on the ones in public, though blogosphere is very public type of place. But making a scene w/ stamping.
Trust me, I've had proper instructions... you stamp it, mask it, then brayer it. First off, I have very little patient. Second, I always managed to muck up anything that has to do w/ a brayer. Third, I don't even know where it went... I think I may have donated it on my first hiatus. Nice, huh?
Well, so, here we are... a faux scene. It, ideally (read: in my head), is a very nice concept. You put them together, little doe looking up at the bird who is guarding the nest. But, it's hard when the real branch doesn't come from a tree... I can't put it too high because then the doe is not looking at the bird but looking into blank space. I can do photography composition better than using inanimate objects and try to put them together. Geez louise.
So, there is also my attempt to make grass happen nicely. It happened... that's all I can say about that. Maybe another try soon... we'll have to see.
Supplies:
Card by SU
Pattered paper by SU
Deer stamp by TGF
Branch/Bird/Nest by MFT
grass by ???

Trust me, I've had proper instructions... you stamp it, mask it, then brayer it. First off, I have very little patient. Second, I always managed to muck up anything that has to do w/ a brayer. Third, I don't even know where it went... I think I may have donated it on my first hiatus. Nice, huh?
Well, so, here we are... a faux scene. It, ideally (read: in my head), is a very nice concept. You put them together, little doe looking up at the bird who is guarding the nest. But, it's hard when the real branch doesn't come from a tree... I can't put it too high because then the doe is not looking at the bird but looking into blank space. I can do photography composition better than using inanimate objects and try to put them together. Geez louise.
So, there is also my attempt to make grass happen nicely. It happened... that's all I can say about that. Maybe another try soon... we'll have to see.
Supplies:
Card by SU
Pattered paper by SU
Deer stamp by TGF
Branch/Bird/Nest by MFT
grass by ???
Subscribe to:
Posts (Atom)